
How to Quickly Use the Add People Feature for Realistic Renders
Learn how to use RenderChat to Add People and quickly add realistic figures to your architectural and interior renderings.
Why add people to architectural renderings?
Architectural renderings can communicate materials, lighting, furniture, and spatial composition very clearly. But without people, even a technically strong image can sometimes feel empty or difficult to understand at a glance.
Adding people helps establish scale, clarify how a space is intended to be used, and introduce a stronger sense of activity and storytelling. Traditionally, this process often required finding suitable cutout people, masking them in Photoshop, adjusting perspective, matching color temperature, and manually recreating shadows.
With RenderChat, the workflow can be much more direct. Instead of manually compositing a person into the image, you can then continue refining the result in the same chat.
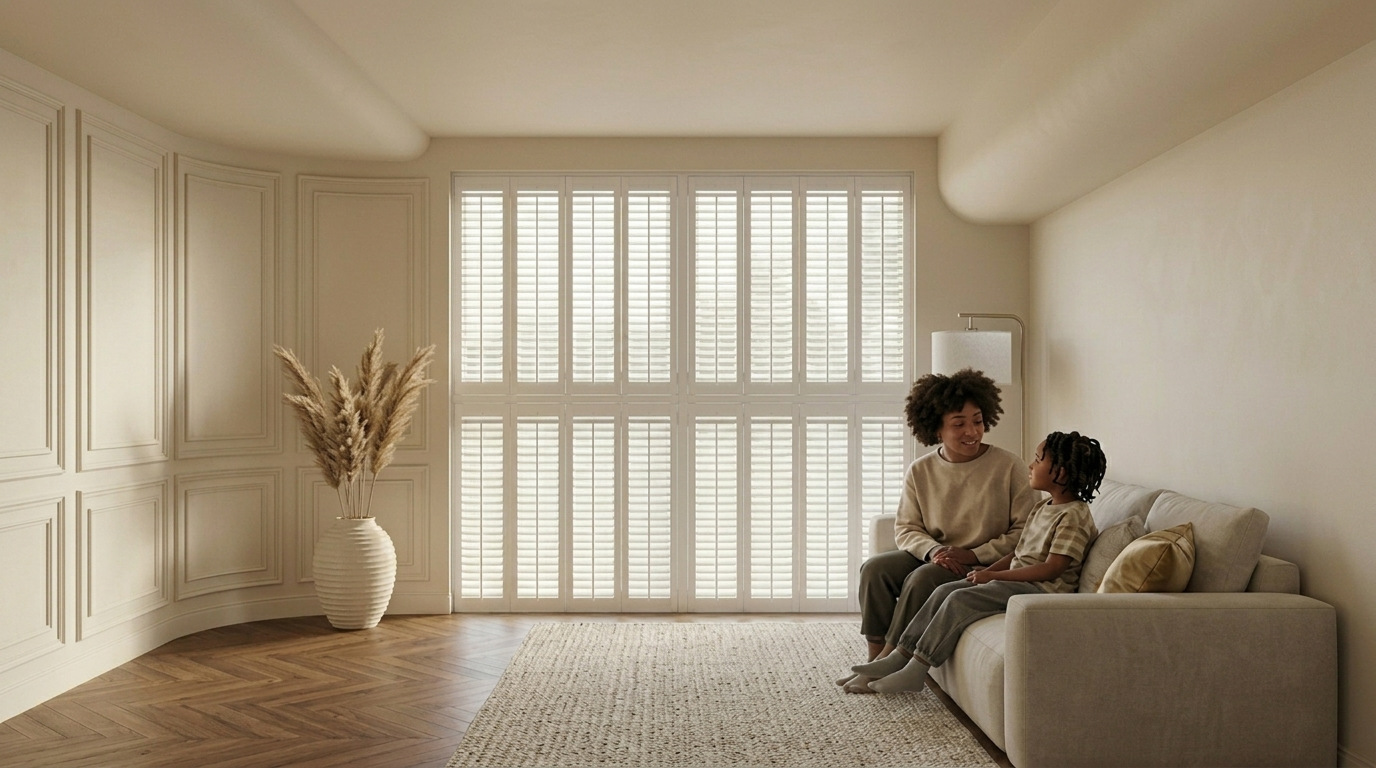
The goal is not simply to place a random person into an image. We want the added figure to make sense in terms of position, scale, activity, clothing, perspective, and the overall atmosphere of the space.
Step 1 — Log in and prepare your reference image
You can use many different types of images, including:
- Residential interiors
- Hotel lobbies
- Offices
- Retail spaces
- Restaurants
- Public spaces
- Exterior architectural renderings
For better results, start with an image that already has a clear perspective and enough open space for the person you want to add.
The original rendering acts as the visual reference. RenderChat should preserve the architecture and overall composition while modifying only the part of the scene you describe.
Step 2: Upload your architectural rendering
After uploading the image, select the area where you want the person to appear and draw a box in the image.
This frame will serve as the basis for AI to determine the position and proportion of the person.
You don't need to manually calculate the height of the character or the perspective ratio; the system will automatically estimate the size and proportion of the character based on the position of the frame and the scene.
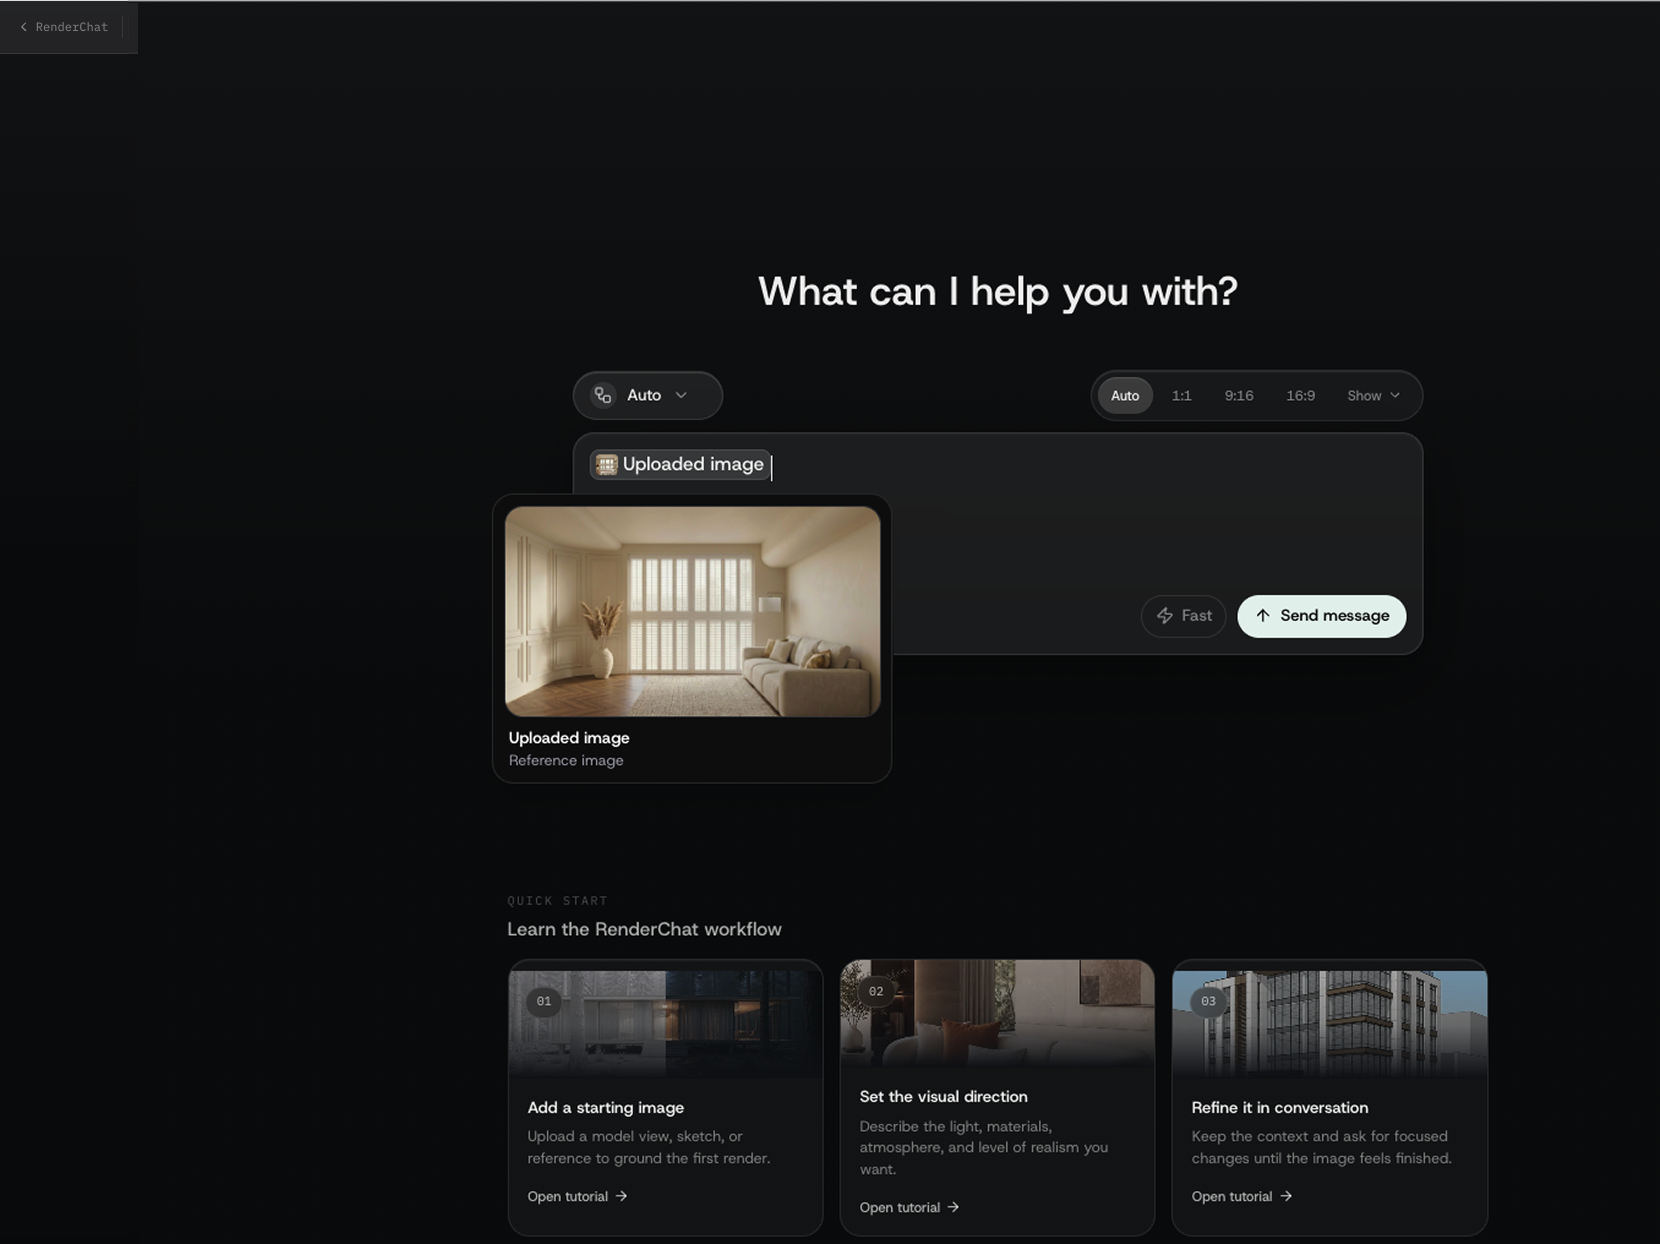
Figure. Upload the architectural or interior rendering where you want to add people
Step 3: Describe the person you want to add
Next, specify the type of character you want the AI to generate.
Unlike a traditional editing interface, RenderChat is conversation-based.
You do not need to configure every character attribute through separate menus. Instead, describe the person directly in the message box.
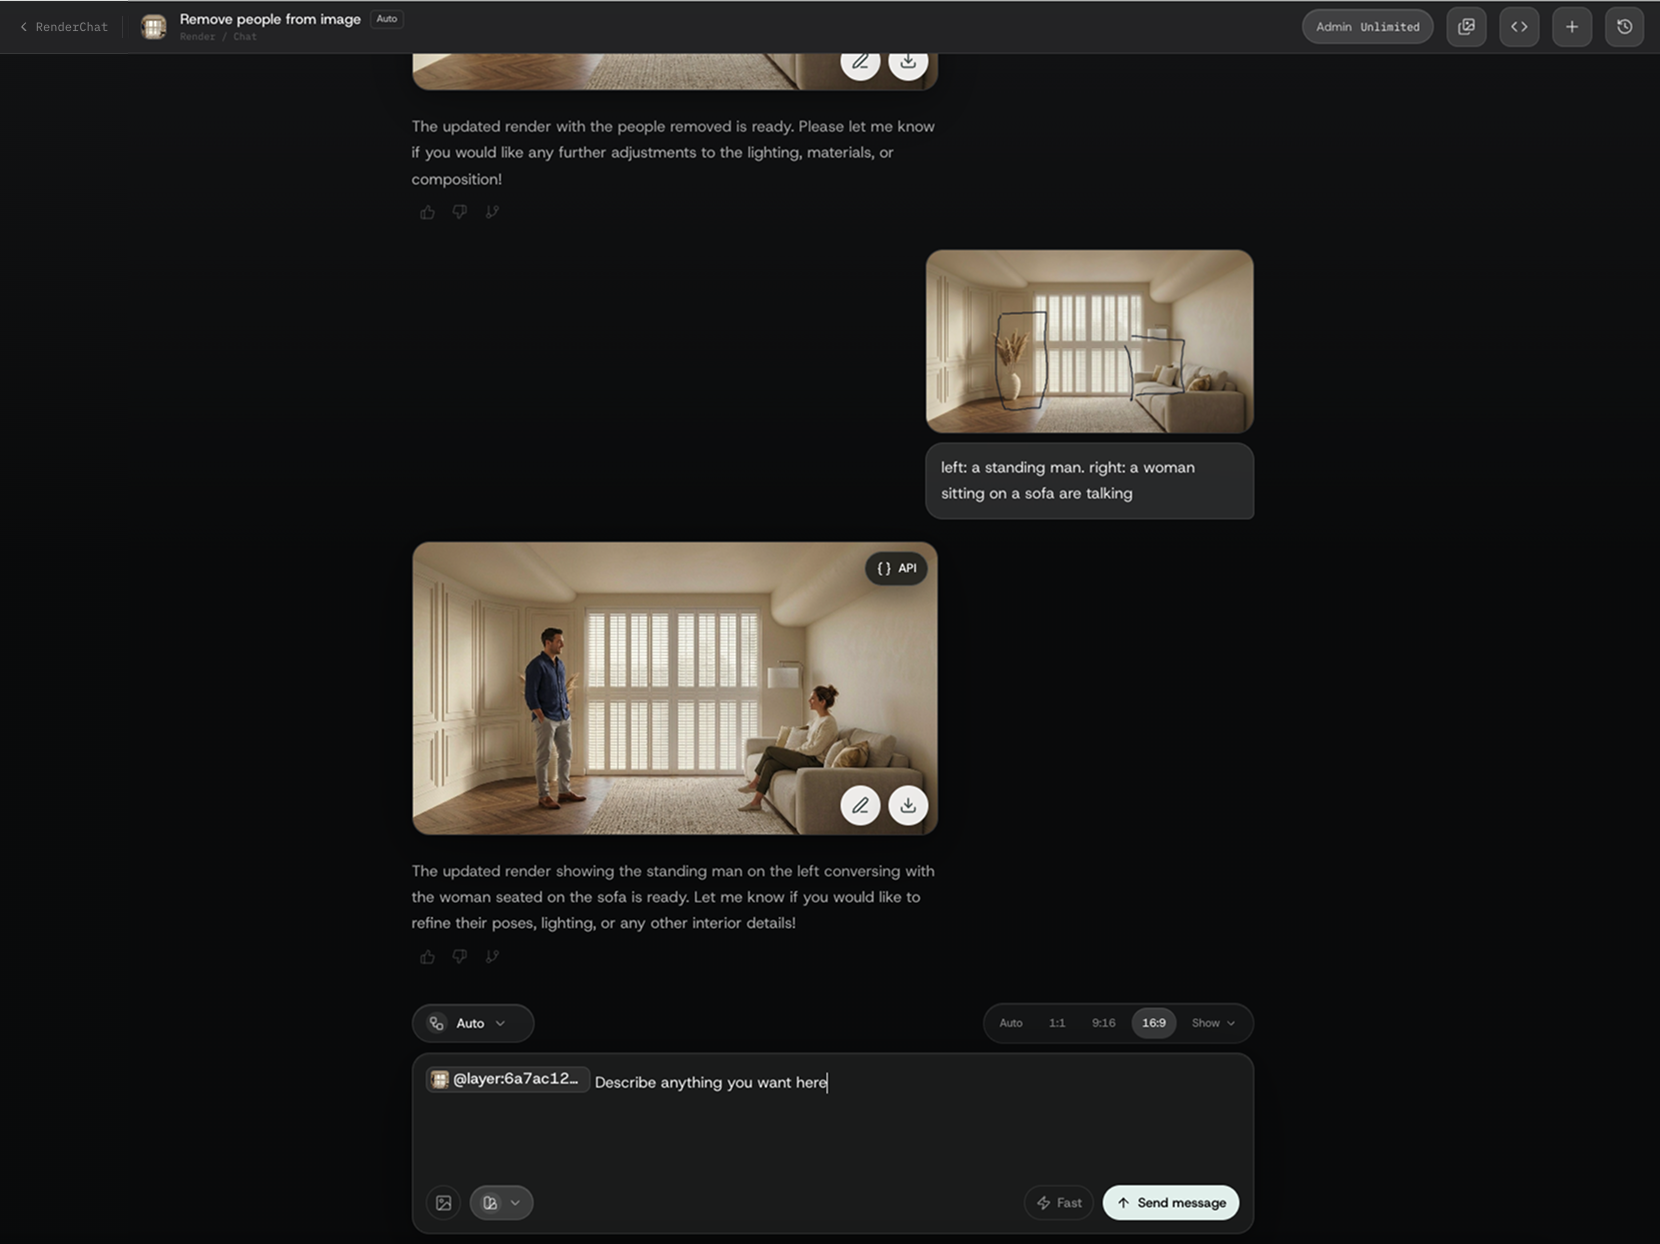
Figure. This gives RenderChat a much clearer relationship between the person and the existing space.
For example:
Add a man standing next to the sofa.

He is around 30 years old, wearing a beige casual shirt and dark trousers.

Make him look relaxed and naturally integrated into the interior.

Keep the existing architecture, furniture, materials, lighting, and camera angle unchanged.
Suggested roles and actions for common space types
| Space Type | Suitable character roles | Suggested actions |
|---|---|---|
| Residential living room | Residents, visitors | Walking, sitting, talking |
| Hotel lobby | Passengers, reception staff | Waiting, checking in |
| Office | Employees, visitors | Walking, discussing, standing |
| Shop | Customers, shop assistants | Browsing products, checkout |
| Public square | Pedestrians, tourists | Walking, staying, interacting |
Common clothing styles and scene matching combinations
- High-end residences: simple, natural, relaxing yet refined
- Office attire: business casual, formal shirts, suit jackets
- Hotel lobby: tourism and leisure, luggage, vacation feeling
- Fitness space: workout clothes, comfortable shoes
- Commercial district: urban leisure, street style
- Exhibition space: minimalist black, white, and gray color scheme; understated clothing
Color suggestions
The colors of the characters' clothing should ideally not overpower the main subject of the space.
If the rendered image itself has a warm color tone, you can choose clothing colors such as beige, brown, white, or warm gray.
If the space is modern and cool-toned, you can choose black, gray, dark blue, or low-saturation colors.
Step 4: Image and check the results
After completing the settings, click "Generate".
The AI will add characters that fit the scene and perspective in the rendered image based on the location you select and the character settings.
After generation, it is recommended to check the following:
- Are the proportions of the human figures natural?
- Are the feet in contact with the ground?
- Is the perspective angle correct?
- Are the directions of light and shadow consistent?
- Does the clothing style match the atmosphere of the space?
- Does the human figure obscure important design considerations?
- Does the visual style convey a stronger sense of story and relatable usage scenarios?
If the result is not ideal, you can adjust the selection position, character description, or clothing settings and then regenerate.
Practical Tips: How to check whether character perspective is reasonable
In the scene, based on perspective principles, vanishing points, perspective lines, and horizon lines are used to help check whether the generated image is reasonable.
The horizon line is usually the horizontal height calculated from the spatial plane where the camera or observer is located. Taking the image below as an example, the observation height is approximately 130 cm. The relationship between the generated character and the horizon line can be quickly checked to see if it is reasonable.
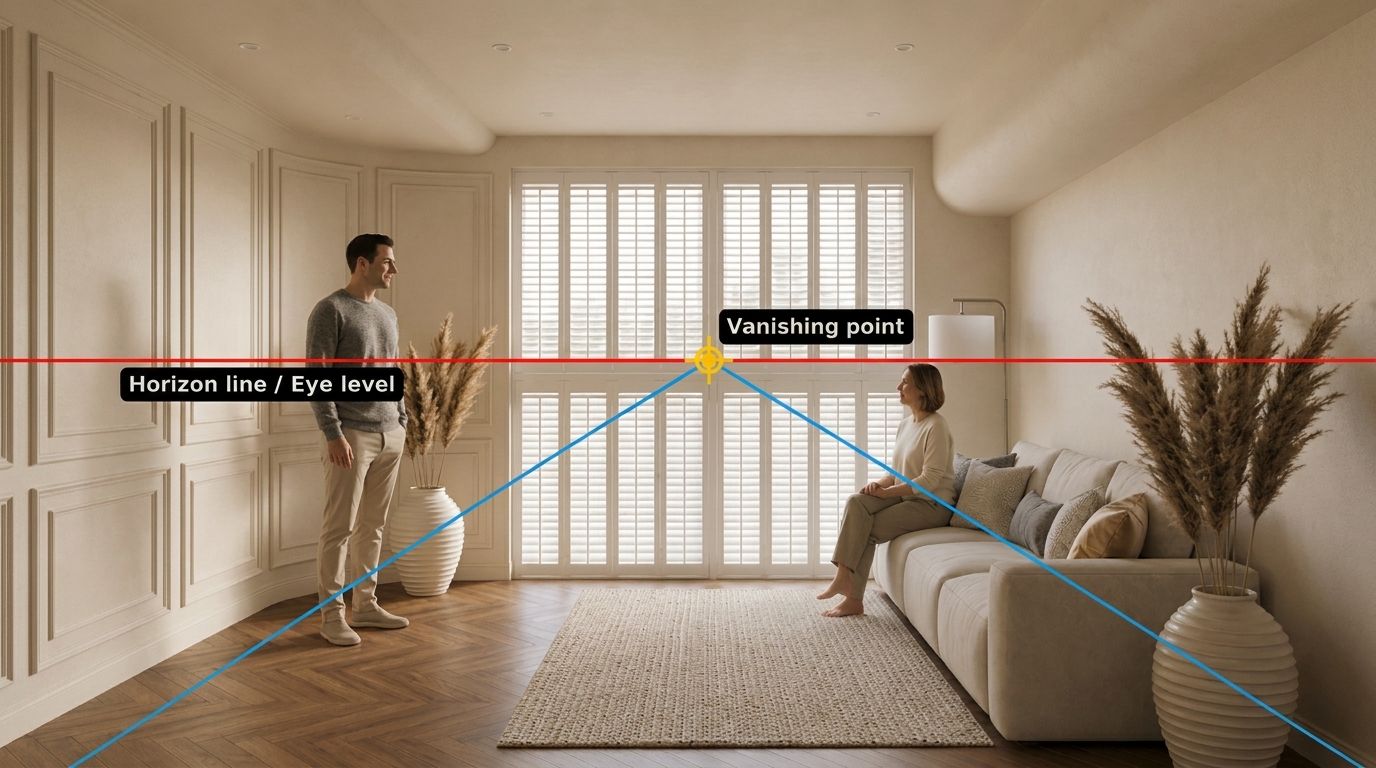
Figure. Use the horizon line to check whether character scale is reasonable
Additionally, AI can generate reasonable character angles and image sizes based on the perspective level of the scene. Here is a perspective experiment to demonstrate:
Mid-Horizontal Line
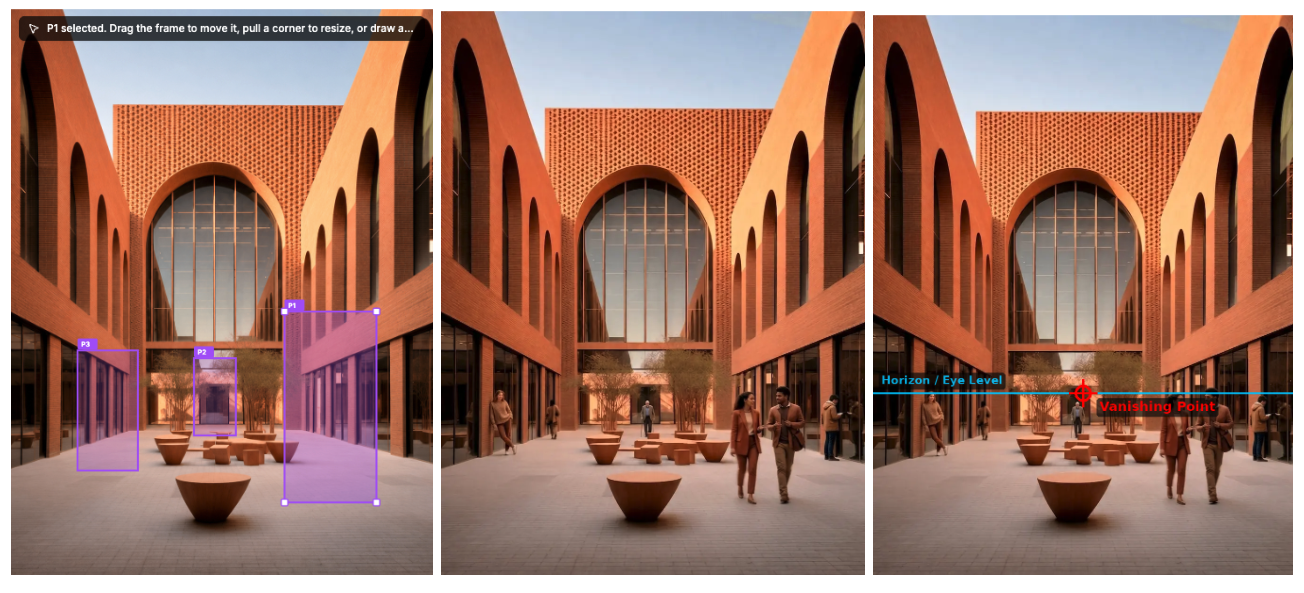
Figure. With a mid-horizontal line, the heads of people are positioned near the horizon line
The heads of the people in the image above are all positioned near the horizontal line, which conforms to the principles of perspective drawing.
High-Horizontal Line
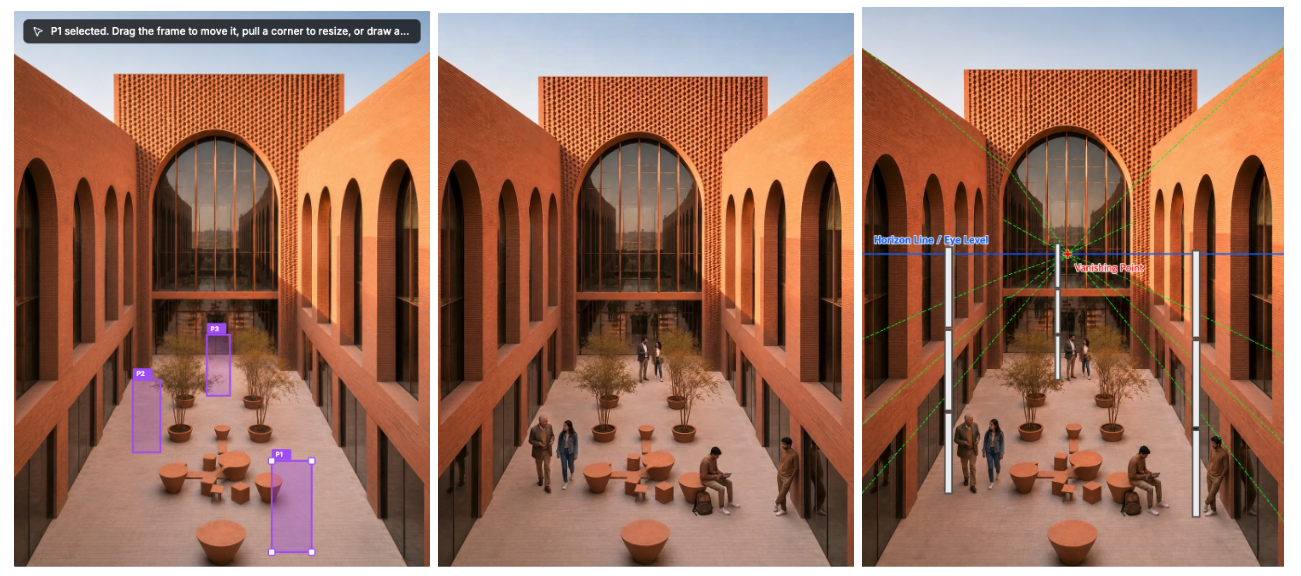
Figure. With a high-horizontal line, the foreground and background figures still follow perspective principles
The horizon line in the image above is approximately three times the height of a person, and the people in the foreground and background confirm that this conforms to the principles of perspective drawing.
Low-Horizontal Line
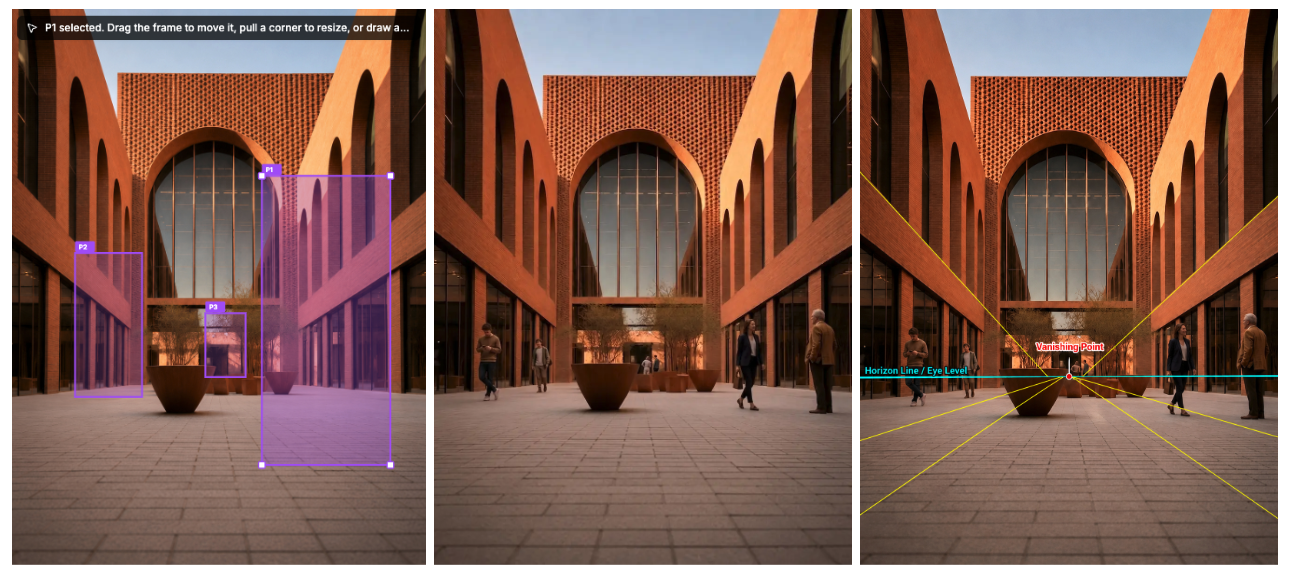
Figure. With a low-horizontal line, the horizon line is close to the ground
The horizon line in the image above is close to the ground, approximately between the people's legs and waist, which conforms to the principles of perspective drawing.
Common application scenarios
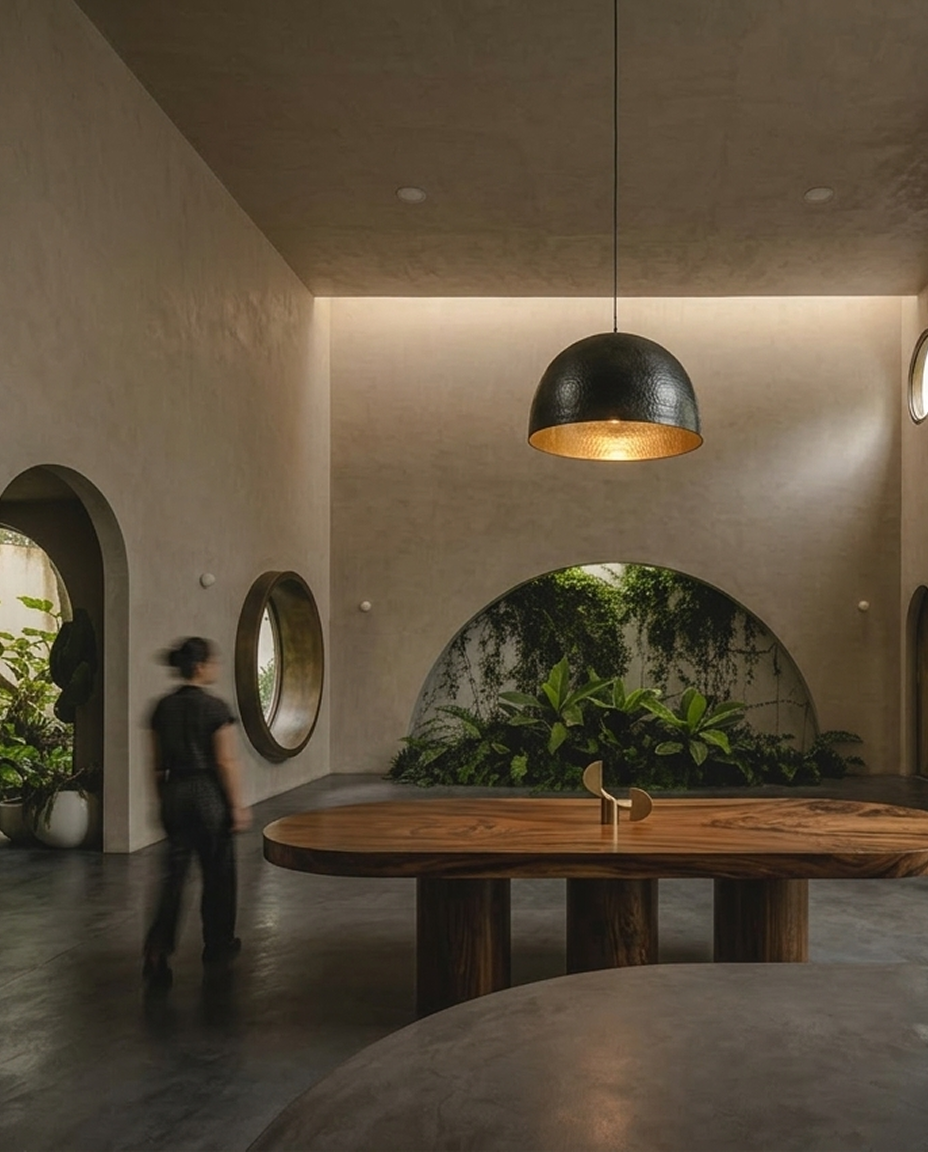
1. Residential Space Proposal
Adding people to the living room, dining room, or open kitchen can make the scene more lifelike and help clients imagine the actual living situation.
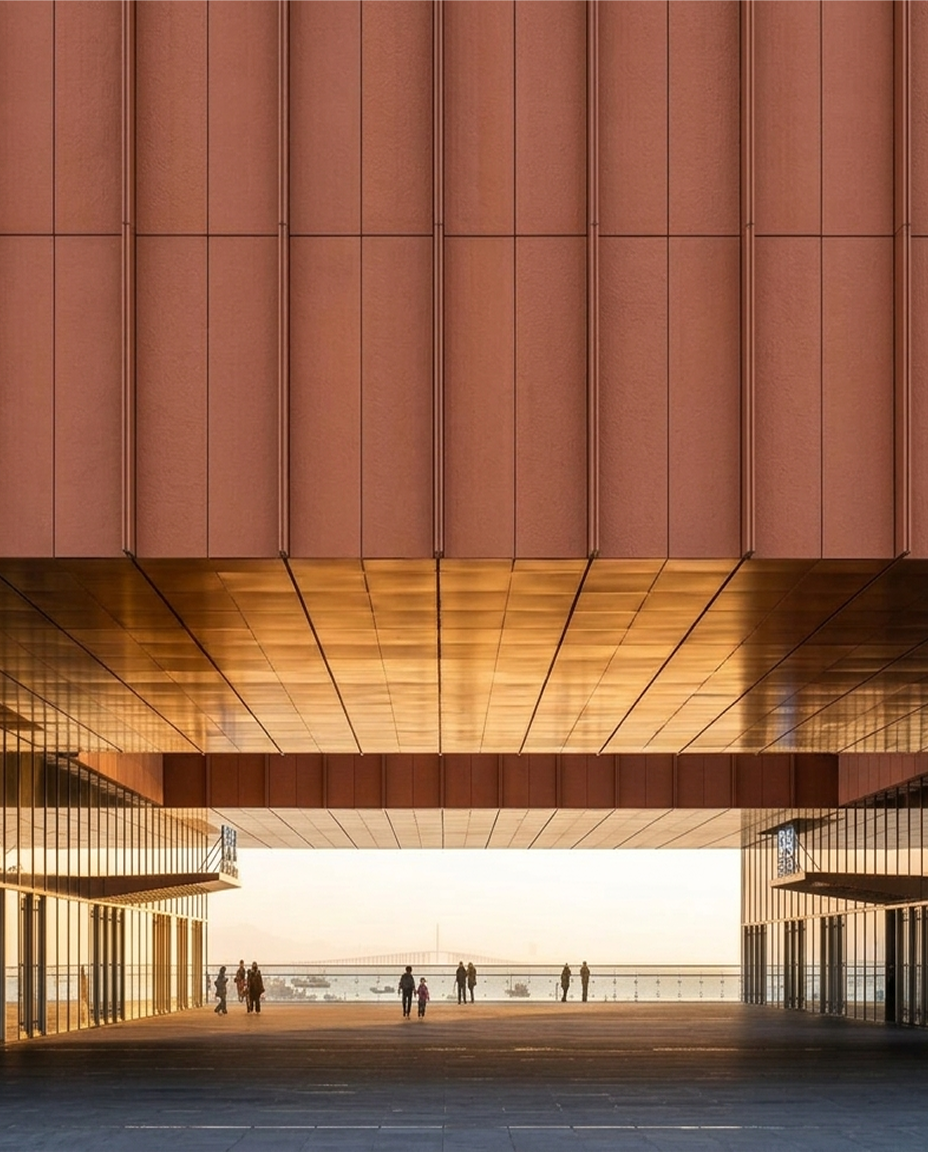
2. Cultural & Exhibition Venues
Placing visitors beneath a grand cantilevered structure — with warm wood-paneled ceilings, terracotta cladding, and a waterfront backdrop — conveys the monumental scale of cultural and exhibition venues while grounding the scene in everyday human activity.
3. Residential & Boutique Hospitality
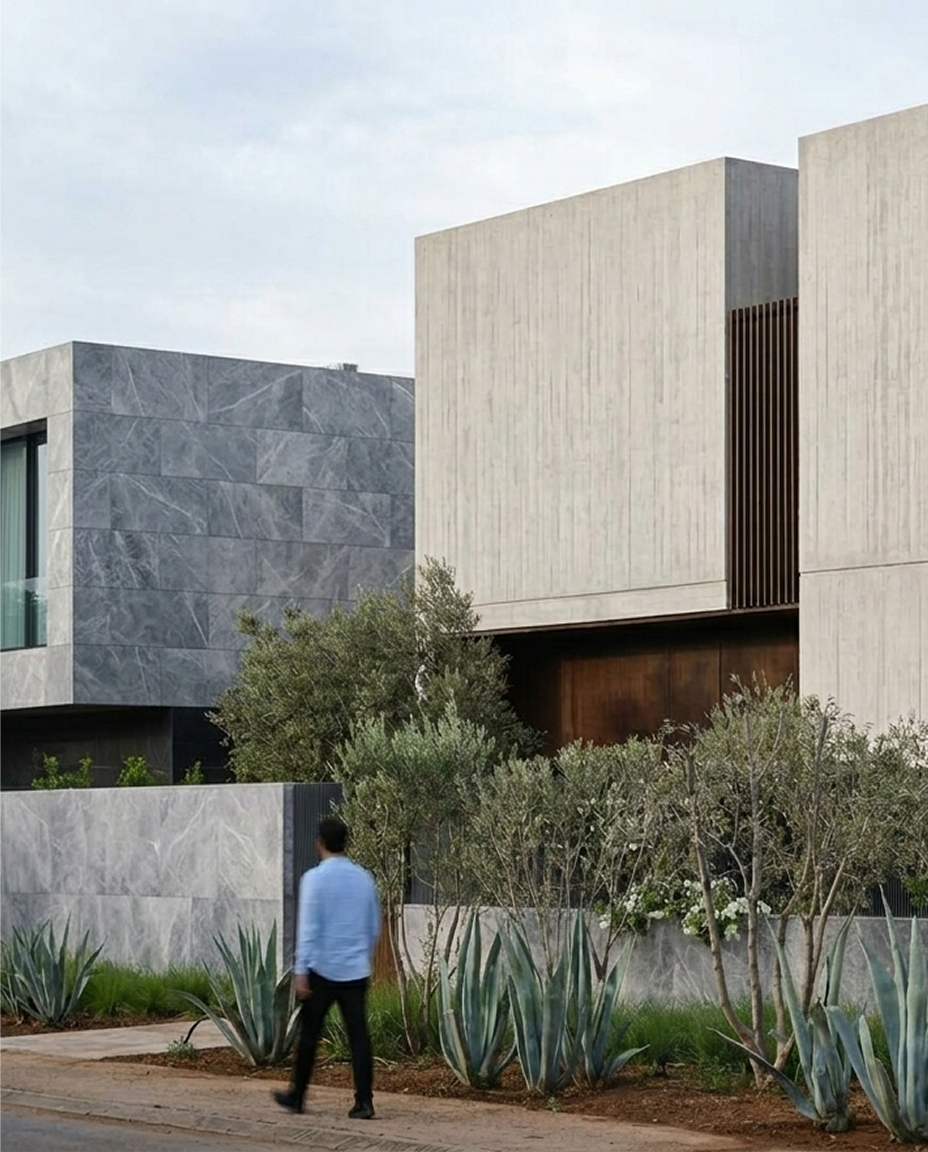
A figure walking past a contemporary facade of board-formed concrete, grey marble panels, and corten steel louvers, framed by drought-tolerant landscaping, lends a sense of arrival and lived-in context to boutique hospitality or high-end residential projects.
4. Education & Childcare Spaces
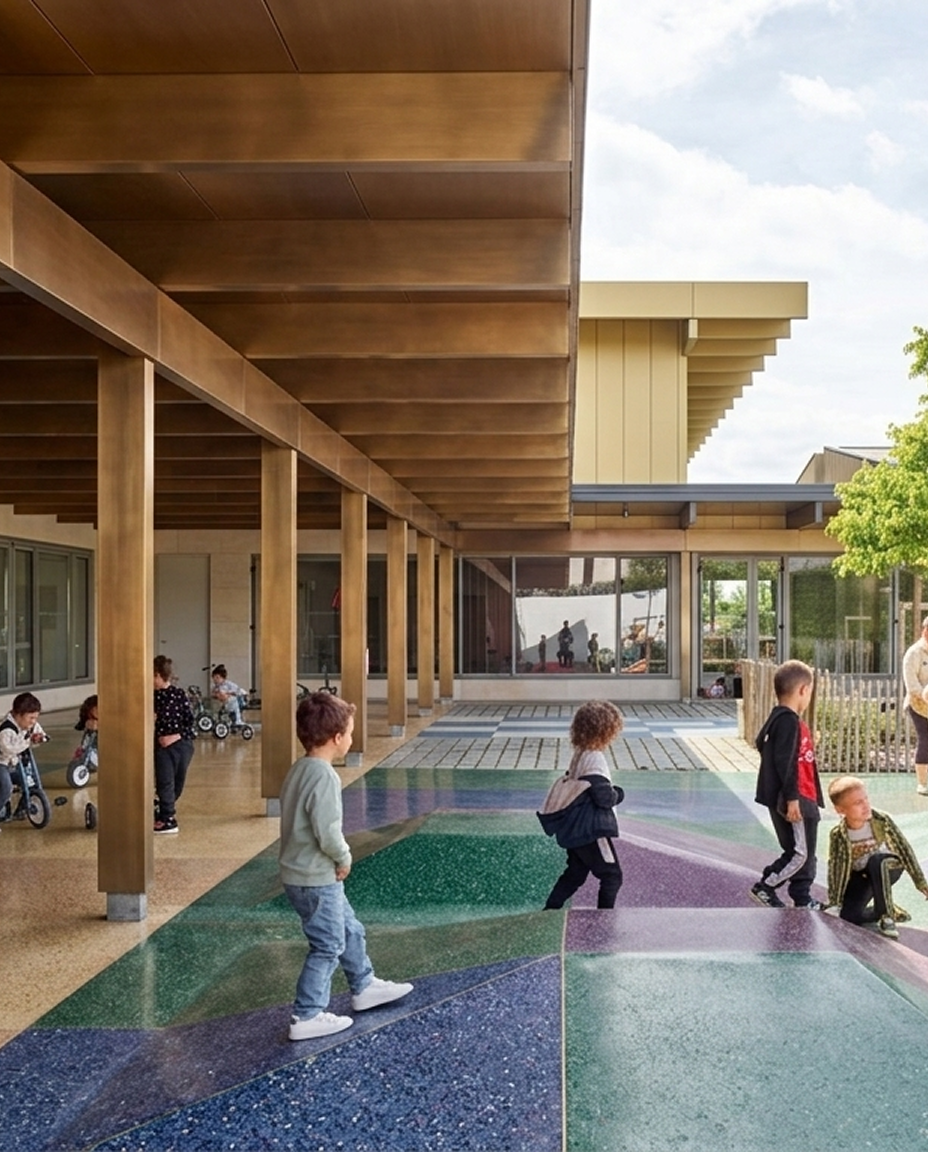
Children playing under bronze-toned colonnades with colorful terrazzo paving immediately communicates the function and energy of a school or kindergarten, making the architecture feel purposeful and alive rather than static.
这篇内容有帮助吗?
相关教程
How to Create Figure-Ground Maps from Aerial Views
Learn how to use RenderChat to turn aerial urban views into clean figure-ground maps for site analysis, portfolios, and urban design presentations.
Aug 27, 2026
How to Turn a Floor Plan into a Professional Portfolio Rendering
A cold 2D CAD drawing can become a clean, readable, and presentation-ready floor plan with the right prompt workflow.
Aug 18, 2026
How to Create Elevation Diagrams from Google Earth
Learn how to use RenderChat and Nano Banana Pro to turn Google Earth street views into clean 2D architectural elevation diagrams.
 Willy·Aug 10, 2026